Official Luthiers Forum!
http://www-.luthiersforum.com/forum/

How do you guys make outside molds?
http://www-.luthiersforum.com/forum/viewtopic.php?f=10102&t=4391
Page 1 of 1

Author:  PaulB [ Thu Jan 05, 2006 9:43 pm ]
Post subject: 

Ok, so I've done the Cumpiano free assembly thing and want to move to outside molds. I've seen some contradictory information particularly about the depth of the mold. If I'm going to be using radiused dishes, then I assume the sides must sit proud of the mold so that they touch the dish. If this is the case, then do you make the mold say 3" and move the rim assembly in the mold when you sand each side? Or do you have an equal amout of rim sitting proud on each side of the mold? I've read Kinkead's book where he has little pegs that he inserts in the inside of the mold to set the height of the rim, but this seems kinda clumsy, anyone got a better way?

Thanks,

Paul

Author:  Jim Kirby [ Thu Jan 05, 2006 10:16 pm ]
Post subject: 

I have both top and bottom of sides proud of the mold, and just prop the mold up off the work table with 2x4 scraps.
(actually, of my two molds, the OM came from John Hall (thanks!) and I made a D mold in the same manner).

I'd like to design a mold that allows a bolt-on neck to be test fit to the body while in the mold - I have some ideas but would love to see examples if anyone has one.

Jim Kirby


Author:  Dickey [ Thu Jan 05, 2006 11:25 pm ]
Post subject: 

Hoffman and Matsushita have two nice methods. I followed Hoffman in using three 3/4 inch plywood layers, but I used Matsushita's 1/4 inch tempered hardboard template as a pattern.

I have multiple molds of some models and the template allows for that. Half mold template is all that's needed. Check their sites, good info. Making molds is a challenge and fun.

Author:  Mark Tripp [ Fri Jan 06, 2006 12:05 am ]
Post subject: 

I essentially followed Hoffman's methodology. Four layers of 3/4 in. baltic birch. I cut the rectangles out for all the layers, (8 pieces) index them together with screws and run them through the jointer to get a tight centerline. Then I draw the pattern on two of the plys, cut with a bandsaw and finish on the spindle sander to make those as perfect as I can get them. I cut the other plys out rough, and re-index with the screws. (One ply at a time) I then run this assembly through a pattern bit on the router table. After they are all shaped, I glue the layers together, finish with a couple of coats of shellac, and add draw catches to both ends.

-Mark

Author:  letseatpaste [ Fri Jan 06, 2006 12:26 am ]
Post subject: 

I'm sure I've posted pics of this before, but here's a different option to consider that I learned from Harry Fleishman. Doesn't get much cheaper and easy to make, and it works great for me so far. And the blocks can be knocked off and reglued very easily for different sizes.

Author:  Brad Goodman [ Fri Jan 06, 2006 1:16 am ]
Post subject: 

I glue 4 pieces of regular birch plywood together-bigger than the entire guitar,then trace the guitar (with centerline)shape onto it and cut out with a bandsaw a hair inside the line-then spindle sand to the line.
Then you can add clamps or bolts to attach the two sides.
It takes me about an hour to make a mold.
...Or you can buy one from John Hall,like I did last time!!

Author:  L. Presnall [ Fri Jan 06, 2006 1:34 am ]
Post subject: 

Buying from John is the quickest way! But, I've made a couple myself...I just don't sit them too close to the ones I bought from John!! (Mine suffer by comparison)...I do the same as Mark...and I round off all the edges inside/out, top/bottom with a 3/16" roundover bit...when my draw latches arrive from harbor freight I'll put them on, but for now, wood "patches" and DW screws do the work.

Author:  old man [ Fri Jan 06, 2006 1:42 am ]
Post subject: 

I built mine with 3 layers of MDF and two layers of 3/4 ply. It is almost 4" thick, which is great if the sides try to cup you have a solid place to brace against. But I also use the peg method, ala Kinkead, which allows me to position the whole rim assembly higher in the mold for kerfing and gluing top and back. It works really well. The only drawback I see is mine is very heavy. Actually, though, that is a plus when you are sanding the rim edges with the radius dish.

Ron

Author:  Michael McBroom [ Fri Jan 06, 2006 2:13 am ]
Post subject: 

I built my outside mold using the design that Sloane outlined in his book, Classic Guitar Construction. One of the things I like about the Sloane design is the removable piece for the neck.

Mine is only 2.25" tall. I used three layers of 3/4" thick MDF for the sides of the mold, and birch ply for the base. I installed a couple of pieces of 2x4 on the base so that it would be easier to use clamps. 2.25" may seem a bit narrow, but I find it to be perfectly adequate for classicals.

As for how I did the actual shaping, I used a template to trace the interior outline on the four pieces and freehanded the exterior outline. Then I cut them close to the outlines with my bandsaw. Then I chucked up a 1.5" sanding drum in my drill press and sanded one of the pieces down to the outlines. After that, I clamped the next piece to this first one and, using a flush cutting router bit, cut the second piece flush with the first. Before unclamping the two pieces, I attached them with deck screws. I followed this same procedure with the thid piece for the mold, staggering the deck screws slightly so I wouldn't screw one directly atop another.

Later, I modified the original Sloane design by adding aluminum pins. I separated the mold from the base, cut it in half down the centerline at the tailblock area, drilled the mold halves and the base for the 3/8" diameter aluminum pins, and glued the pins to the base. This allows me to remove the mold halves from the base easily, but they still remain a snug fit. I wanted to do this so I could leave a 1/2" or so margin around the outline of the top or back of the guitar, while still allowing it to rest in the mold. I'm still not comfortable with trimming a top or back to its final outline before attaching it to the sides.

The following photos show the mold after I added the pins.


Best,

Michael


Michael McBroom38723.4303587963

Author:  tl507362 [ Fri Jan 06, 2006 4:39 am ]
Post subject: 

The beginning of Robbie's DVD shows you how to make an easy side bending machine and an outside mold. It is highly recommended, and you will love the mold. It is about 3" in thickness with threaded inserts on the ends to allow it to come apart. He also shows how to make the easiest spreaders you've ever seen!
Tracy

Author:  Colin S [ Fri Jan 06, 2006 9:36 pm ]
Post subject: 

Michael,

I like the design of your mould/solera and the removable neck section. If you put an oversize half inch riser layer under the bottom layer it would give clearance for the plate overhang, while still supporting the sides. I'm currently building a solera and will be stealing a lot of your ideas!

Colin

Author:  Serge Poirier [ Fri Jan 06, 2006 11:10 pm ]
Post subject: 

Naaaaah, Colin, you're just sayin' that!

Serge

Author:  arvey [ Sat Jan 07, 2006 3:42 am ]
Post subject: 

I just used scraps lying around the shop t0 make my moulds. I am always saying I am going to make nicer ones but never get around to it.

Author:  Serge Poirier [ Sat Jan 07, 2006 4:35 am ]
Post subject: 

I use of lot scraps as well, when beautiful wood comes around, i'd rather use it for guitar buiding!

Serge

Author:  Michael McBroom [ Sat Jan 07, 2006 6:34 am ]
Post subject: 

[QUOTE=Colin S] Michael,

I like the design of your mould/solera and the removable neck section. If you put an oversize half inch riser layer under the bottom layer it would give clearance for the plate overhang, while still supporting the sides. I'm currently building a solera and will be stealing a lot of your ideas!

Colin[/QUOTE]

Hi Colin,

Actually, I built a pair of "sides" out of 1/2" ply, about 1-1/2" wide or so, that fit inside the above mold. I covered one side with felt to protect the guitar's finish. I did this so that I could lay a guitar top-down in the mold after the bridge was attached. I also have a piece of construction paper cut out to a little larger than the mold shape with 1/8" thick cork perimenter that I place under a braced top to preserve the arch. I have to remove the mold's sides to set it in place. I've also found that the 1/2" ply "sides" work pretty well to support the guitar back, which usually has enough of an arch to render the 1/8" thick cork spacer too shallow.

Best,

Michael
Michael McBroom38724.610150463

Author:  Alan Carruth [ Sat Jan 07, 2006 9:45 am ]
Post subject: 

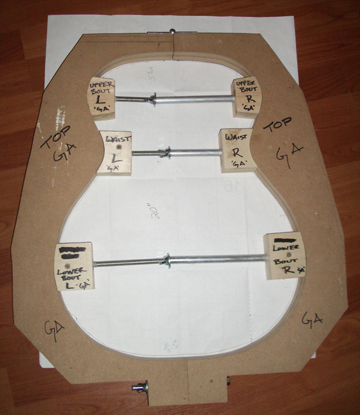
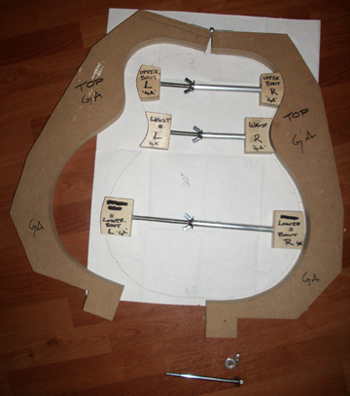
I start with a half pattern of the outline of the guitar, cut from 1/4" tempered Masonite or acrylic. The inside curve is the guitar shape, and it's about 2" wide above the shoulders and below the hips, with those curves connected by a straight line. I drill a half dozen, 1/4" holes in it spaced more or less evenly. The ends of the pattern are cut off exactly on the centerline of the guitar.

I trace this pattern four times onto a piece of good quality plywood, around 5/8" thick. Rough cut those out, staying clear of the line by 1/16" or a little more, on the bandsaw.

Clamp the pattern down to one of the plywood pieces so that it's reasonably centered, and drill through the plywood using the 1/4" holes in the pattern as a guide. Then use stubs of 1/4" dowel to pin the pattern to the plywood.with the dowels flush with the pattern surface, and remove the clamps. Use a top-bearing pattern following bit in the router to cut the plywood to exactly the shape of the pattern. If you're using Masonite, wax the edges before routing.

I then cut 2" squares of the scrap ply and drill 1/4" holes in the centers. Stack glue two of the ply cuttouts with spacers in between, using 1/4" dowels as locators. I use a flat bench top ad my go-bar deck for this. Check carefully with the square in two places that are 90 degrees out of line, such as above the shoulders and below the hips, to be sure you don't build in any twist or sideways displacement. Do not put spacers in the holes closest to the ends.

When you've got two of these half mold stacks glue them together using a plywood bridging piece about 5 or 6 inches long. This can be drilled out and pinned after the glue is dry for extra strength. If any of the spacers hang out, the laminate trimmer will get them.

The resulting mold is a bit more than 2" high, which is enough to ensure that the sides are perpendicular but not so tall as to get in the way when you're sanding the edges in the dish or clamping on liners. I like to leave the sides in the mold from the time I glue on the end blocks until the braces are all trimmed up and the plates routed to the exact size.

The big advantage of this method is that all four of the mold pieces are identical, so you're guitar mold is axially symmetric. You only have to make nice curves once, when you make the pattern, and don't have to worry about matching things: that's all taken care of in the process. You've also got the center line spotted exactly, by the seam at the ends.

I use the pattern to draw guitar shapes on backs and tops, to get the best looking wood.

Author:  Mattia Valente [ Sat Jan 07, 2006 7:26 pm ]
Post subject: 

I make mine by making an accurate half-body template, then copy-routing that to 6 22mm thick MDF blanks. This gives me a mold 66mm thick (about 2.6"), enough to hold the sides in place, but also allow me to sand the arch into back and top without having to move the rimset out of the mold. I also like the full support (no gaps) I get. My bending molds are also solid under the sides, and I let the sides dry out properly in the mold (a second heat cycle usually does the trick) so there really shouldn't be cupping problems once they're in the mold.

For deeper models, I am toying with the idea of having optional 'stack on' sections to the mold, something I saw at Sylvan Wells' shop last spring.

Author:  PaulB [ Sat Jan 07, 2006 11:26 pm ]
Post subject: 

Thanks fellas, just what I was after.

I'd made a mold ala Kinkead, but stuffed it up when routing - that's what happens with a big router base plate and not much mold to support it underneath. I managed to work around the stuff-up today by increasing the mold dimensions by the thickness of the sides and re-routing. Amazing how a solution will present itself if you just sit and think a while - I ain't never been no fast thinker.

A couple of you have said that you start with an accurate half body pattern/template. Do you not increase the size of the pattern, and therefore mold, by the thickness of the sides? Or do you reduce the bending form by the thickness of the sides, or do you not bother with either? The sides have gotta fit in there somewhere, how do you do it?

Ok, so I've probably got enough brains to figure out my way of doing it, but I'm interested (lazy) in how you guys do it.

Author:  Colin S [ Sun Jan 08, 2006 12:13 am ]
Post subject: 

Paul, The half body template, I use acrylic, is the outside shape of the guitar so the sides fit inside that shape, with the outside of the side conforming to it. The top/back then fit on top of the sides, see? So the mould exactly conforms to the template.

I decrease the bending form by the thickness of the side+slat, but we're only talking 2.5mm tops, so you could probably get away without. Just put the hot side into the mould and tighten the cauls to let it cool to shape, which I do as well.

Colin

Author:  Dickey [ Sun Jan 08, 2006 1:41 am ]
Post subject: 

[QUOTE=PaulB]I'd made a mold ala Kinkead, but stuffed it up when routing - that's what happens with a big router base plate and not much mold to support it underneath.[/QUOTE]

Paul, Have you ever considered a router table for this job? It gives you tremendous stability. Hoffman uses his heavy shaper if I remember right. I bought one of those but it sits unused as yet two years later.

The $40US price tag of a router table, generic, makes the router even more versatile and stable. I cut dovetails of both body and neck, rout neck shape to fingerboard, build molds, etc etc... I love pattern following use of the router and the stability of the router table.

I might mention the use of screws in my mold making. Instead of pins, I use cabinet hinge screws to attach the template to my proud cut plywood blank. Once that blank is cut, I use it as the template.

By screwing the next proud blank to it, you simply cut using the first one as the template. However you do it, it's a satisfying experience, to complete a well-made mold. I like to add ears to my molds, which serve the function of bolting them together. Employing the use of steel dowel pins, the molds always perfectly align when closed. That idea came from Hoffman as well, he used wooden dowels if memory serves me right.

Author:  Mike Mahar [ Sun Jan 08, 2006 4:02 am ]
Post subject: 

To make my bending form, I make the outside mold using techniques similar to those mentioned above. (acrylic 1/4" outside template, pattern following bit in the router table). I use my outside template to draw the shape for my bending form. To do this I take a thin washer; one that has a .1" rim. I put a pencil inside the washer and run the washer around the template. THis makes a line .1" inside the original template.

I double stick tape two 1/2" plywood pieces together and cut them out on the band saw a little bit outside the line. I then clean sand down to the line with my disk sander and spindle sander.

Author:  Matt Mustapick [ Sun Jan 08, 2006 5:31 pm ]
Post subject: 

http://mustapickguitars.com/28reynolds/11/index.html

Just two pieces of 1/2 plywood spaced by chunks of 2x4s. The two halves are just bar-clamped together.

Super quick and easy to make, very stable, and most importantly, *very light*.

Author:  j.Brown [ Sun Jan 08, 2006 5:35 pm ]
Post subject: 

I just finished mine tonight. Waaaayyyy too long to finish it. Ugh. Long day finishing it up. A few rookie setbacks, but it is a modified version of Robbie O'Briens. I added a heavy duty hinge on top instead of another bolt-through hex head bolt. Mostly because I jacked up the mold to start with and didn't leave myself enough room for the bolt. The spreaders were super easy though, and work out great.
Its a happy accident for the time being. I only need to bolt on one side, now and it seems to work out pretty well. We'll see as I go along.


Top view of the GA outside mold.


Hinge Open version.

-j.

Page 1 of 1 All times are UTC - 5 hours
Powered by phpBB® Forum Software © phpBB Group
http://www.phpbb.com/